How to Punch a Hole Between Two Existing Holes (Precision Method)
How to Punch a Hole Between Two Existing Holes (Precision Method)
Quick answer: To punch a new hole exactly between two existing belt holes, measure the distance between them, mark the precise midpoint with a pencil (do not eyeball it), confirm the mark sits on the centerline of the row, then use a spinning awl or sharp punch to create a clean hole. The trick is the measurement — a 1mm offset is visible on a 4mm hole — and using a tool that bores instead of tears.
Last updated: May 2026 • By BELTLEY Editorial
TL;DR:
- Measure the gap between the two existing holes with a steel ruler — don't eyeball.
- Mark the midpoint with a pencil dot on the row's centerline.
- Confirm alignment along the length and across the width before piercing.
- Spin the awl — don't hammer — so the hole stays round and clean.
Belt holes are usually spaced about 25mm (1 inch) apart, which means a between-the-holes punch effectively gives you a half-size fit — exactly the adjustment most people need when weight, layering, or a single mistimed meal puts them between notches. The catch is precision: a hole that's 1mm off center looks obviously homemade. Below is the precision method that gets it right. For the simpler case of adding a hole at the end of the existing row, see how to add a hole without a punch tool.
Why punch between two existing holes?
Because standard belt-hole spacing is too coarse. Most belts space holes about 25mm (1 inch) apart, which corresponds to about 1 inch of waist adjustment per hole. That's a full pant size between notches — fine most days, frustrating after a heavy meal or with thicker layers. A between-the-holes punch creates a half-size fit and is the most useful single DIY repair for a belt that's almost perfect.

The geometry is the whole reason. Belt holes form an evenly spaced row on the strap's centerline — typically 5 to 7 holes covering about 5 inches of adjustability. A new hole at the midpoint between two existing ones effectively doubles the resolution at that part of the strap. Our men's belts and dress belts ship with 7-hole rows that already give a wide fit window — the in-between punch is for the rare case where you need finer control.
How do you find the exact midpoint?
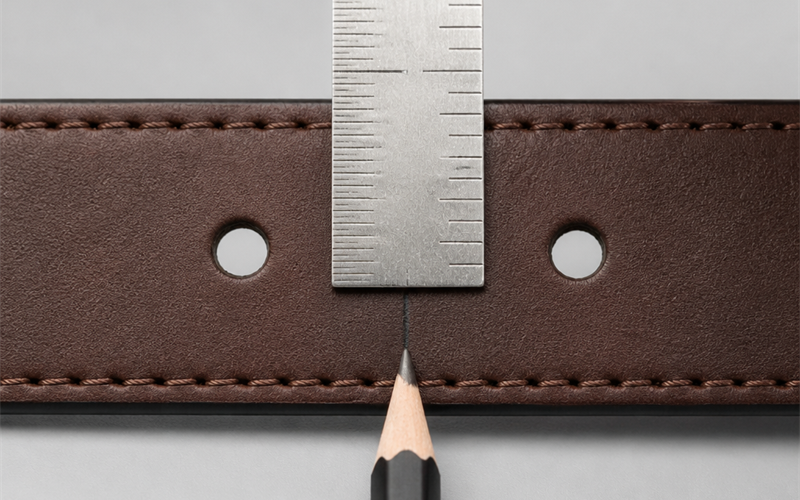
Measure, don't guess. Lay the belt flat on a hard surface, set a steel ruler along the row of existing holes, and read the precise distance between the two holes you're aiming between. Divide that number by two and mark the midpoint with a pencil dot — directly on the same imaginary line that runs through the centers of all the existing holes.
Precision is the only thing that matters here. Most belts space holes at exactly 25mm (or 1 inch on imperial belts), so the midpoint is 12.5mm (or 0.5 inch) from each existing hole. A 1mm offset is enough to spoil the look once the belt is on — the new hole will appear visibly out of line. Take 30 seconds with the ruler instead of eyeballing it; the result is the difference between "factory" and "obviously homemade."
Key stat: Belt holes typically sit at 25mm (1 inch) intervals, which means the midpoint between two holes is exactly 12.5mm from each one. That's the tolerance you're aiming for — and a 1mm offset is visible at conversation distance.
How do you align the mark with the centerline?
Use the existing holes as your guide. The holes already sit on a perfectly straight line down the strap's centerline (that's how the factory punched them), so your new mark just needs to sit on the same imaginary line. The simplest check: place the ruler so it passes through the centers of two existing holes, then mark the midpoint where the ruler crosses.

Two-axis alignment matters. The mark needs to be (1) exactly halfway between the two reference holes along the strap's length, and (2) exactly on the centerline across the strap's width. If your belt is symmetric top-to-bottom (most are), the centerline is dead center between the strap's edges. Skip either check and the hole drifts off-row visibly. Our full-grain leather belts are pre-marked by jig at the factory — replicating that precision at home is the whole point of this method.
What tool gives the cleanest result?
A spinning awl, a stitching awl, or a proper drive punch. (1) Awl — a sharp metal point you rotate through the leather; clean and round. (2) Drive punch (like Osborne or Tandy) — a hollow cylindrical punch you tap with a mallet for a perfect circle; the most professional result. (3) Rotary punch (the squeeze-handle kind) — works on thinner belts but can crush thick full-grain leather.

Match the tool to the leather. For most full-grain belts (4–6mm thick), a 4mm drive punch with a wooden mallet gives the cleanest factory-look hole. A spinning awl is the best home alternative if you don't want to buy a punch. Avoid hammering a finishing nail straight through — it tears fibers and crushes the edges. The same principle applies on our double layer belts, which need a sharper tool because they're twice as thick.
Precision-punch step-by-step
| Step | Action | Tool |
|---|---|---|
| 1. Measure | Find the gap between the two reference holes | Steel ruler |
| 2. Calculate | Divide gap by 2 to find midpoint | — |
| 3. Mark | Pencil dot at midpoint on centerline | Sharp pencil |
| 4. Verify | Confirm two-axis alignment (length + width) | Ruler |
| 5. Back the belt | Hard wood block under the mark | Wood scrap |
| 6. Pierce | Spin awl or drive punch through cleanly | Awl + mallet |
| 7. Finish | Condition the new edge to prevent fraying | Leather conditioner |
What size should the new hole be?
Match the existing holes — usually 4–5mm. Eyeball the diameter of the original holes and use a punch of the same size, or rotate your awl until you've widened the hole to match. The new hole only needs to be just slightly larger than the diameter of your buckle's prong.
Slightly small is better than slightly large. A snug hole holds the prong cleanly and prevents stretching at that notch over time. If your awl makes a smaller hole than the existing ones, you can carefully widen it with a few more rotations or by stepping up to a larger drive punch. Once a hole is oversized, it can't be shrunk — so test gradually.
How do you finish the new hole?
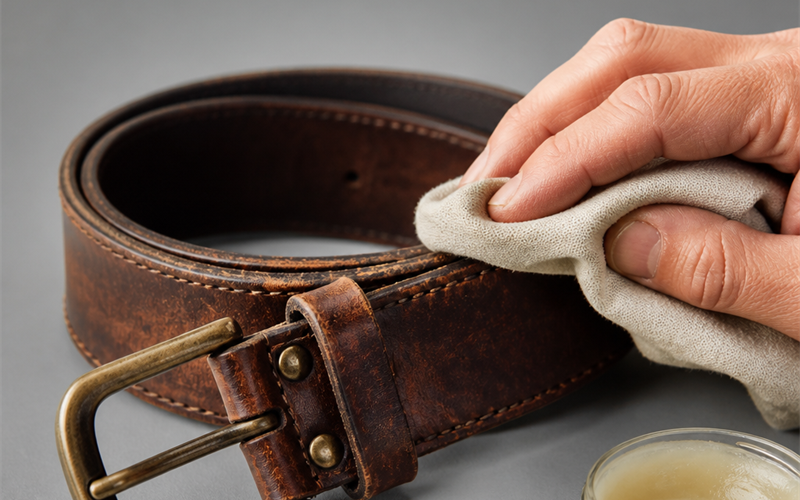
Smooth and condition. After piercing, use your awl tip to round the inside edges of the hole by rotating in both directions for a few seconds. Then rub a tiny drop of leather conditioner around the rim with your finger. The conditioner seals the cut fibers and prevents the hole from fraying or wicking moisture.

Edge sealing extends the life of the new hole. A raw cut fiber edge absorbs sweat and humidity and frays out over time — which is why every quality belt has burnished or sealed edges from the factory. Our leather care page covers basic conditioner use; any neutral leather balm works. Let the belt rest 10 minutes before wearing.
What mistakes ruin the look?
Three big ones. (1) Eyeballing the midpoint — even a 1mm offset is visible. (2) Drifting off the centerline — punching above or below the existing row makes the new hole look obviously stuck-on. (3) Tearing instead of boring — a hammered nail or dull tool produces an oval hole instead of a clean circle.

Each mistake is a measurement problem. Lay out the ruler properly, mark with a sharp pencil, and verify both axes before you pierce. Use a sharp tool that bores cleanly. If the belt is precious (vintage, exotic, designer), consider taking it to a cobbler — they'll punch a perfect hole for $5. Our exotic leather belts should always be punched by a pro because the scale patterns and finishes are unforgiving.
The Bottom Line
Punching a hole between two existing belt holes is a 5-minute precision job — but the precision is the entire point. Measure the gap, divide by two, mark on the centerline, verify both axes, then spin or drive a clean hole through wood-backed leather. Skip the eyeballing and skip the hammer, and you'll end up with a hole that looks like it came from the factory. At BELTLEY, our belts ship with 7 evenly spaced, hand-finished holes designed to keep most wearers out of DIY territory — but when you need that half-size, the precision method works on any of our full-grain leather belts. Backed by a 10-year warranty and built for a lifetime of small adjustments. Ready for a belt you'll fine-tune once and wear for years? Browse our men's collection.
Frequently Asked Questions
Q: How do I find the exact midpoint between two belt holes?
Measure the distance between the two holes with a steel ruler and divide by two — usually that's 12.5mm (about half an inch) for standard 25mm hole spacing. Mark the midpoint with a sharp pencil dot on the same centerline as the existing holes.
Q: What's the best tool for the cleanest hole?
A sized drive punch (4mm or 5mm to match your existing holes) tapped with a wooden mallet gives the most professional result. A spinning awl is the best home alternative. Avoid hammered nails — they tear and leave oval holes.
Q: Why does my new hole look obviously homemade?
Almost always because it's off-axis. Even a 1mm offset along the row's length or across the strap's width is visible at conversation distance. Measure both axes carefully before piercing, and use the existing holes as your guide.
Q: Should I seal the edges of a new belt hole?
Yes. A quick rub of leather conditioner around the new hole seals the cut fibers and prevents fraying. It takes 10 seconds and adds years to that notch's life — especially on belts that sweat through humid days.
%0A%0AQuick%20answer:%20To%20punch%20a%20new%20hole%20exactly%20between%20two%20existing%20belt%20holes,%20measure%20the%20distance%20between%20them,%20mark%20the%20precise%20mid...)